- Testing RubixKube before deploying to production
- Learning how RubixKube works in a safe environment
- Development on your laptop without cloud costs
- Training team members on RubixKube features
Complete Beginner?No problem! We’ll walk you through installing everything from scratch, even if you’ve never used Docker or Kubernetes before.
What You’ll Install
Before we can run RubixKube locally, we need a few tools:Docker
Container runtime that runs Kubernetes
KIND
Runs Kubernetes clusters locally in Docker
kubectl
Command-line tool to interact with Kubernetes
Estimated Time:20-30 minutes for first-time installation (including downloads)
Step 1: Install Docker
Docker is required to run KIND. Choose your operating system below:- macOS
- Windows
- Linux
Install Docker Desktop on macOS
Option 1: Using Homebrew (Recommended)
If you have Homebrew installed:Option 2: Download from Docker Website
- Visit Docker Desktop for Mac
- Click “Download for Mac”
- Choose your Mac type:
- Apple Silicon (M1/M2/M3 Macs)
- Intel Chip (older Macs)
- Open the downloaded
.dmgfile - Drag Docker icon to Applications folder
- Launch Docker from Applications
Verify Docker Installation
Open Terminal and run:Step 2: Install KIND
KIND (Kubernetes in Docker) creates Kubernetes clusters using Docker containers as nodes.- macOS
- Windows
- Linux
Step 3: Install kubectl
kubectl is the command-line tool for interacting with Kubernetes clusters.- macOS
- Windows
- Linux
Step 4: Create a KIND Cluster
Now that we have all prerequisites installed, let’s create a local Kubernetes cluster!Create Your Cluster
Run this command in your terminal:- The cluster is named
rubixkube-local - This takes 1-2 minutes
Expected Output:
Verify Your Cluster is Running
Troubleshooting:If the node shows “NotReady”, wait 30 seconds and check again. It takes time to initialize.
Step 5: Install RubixKube Observer
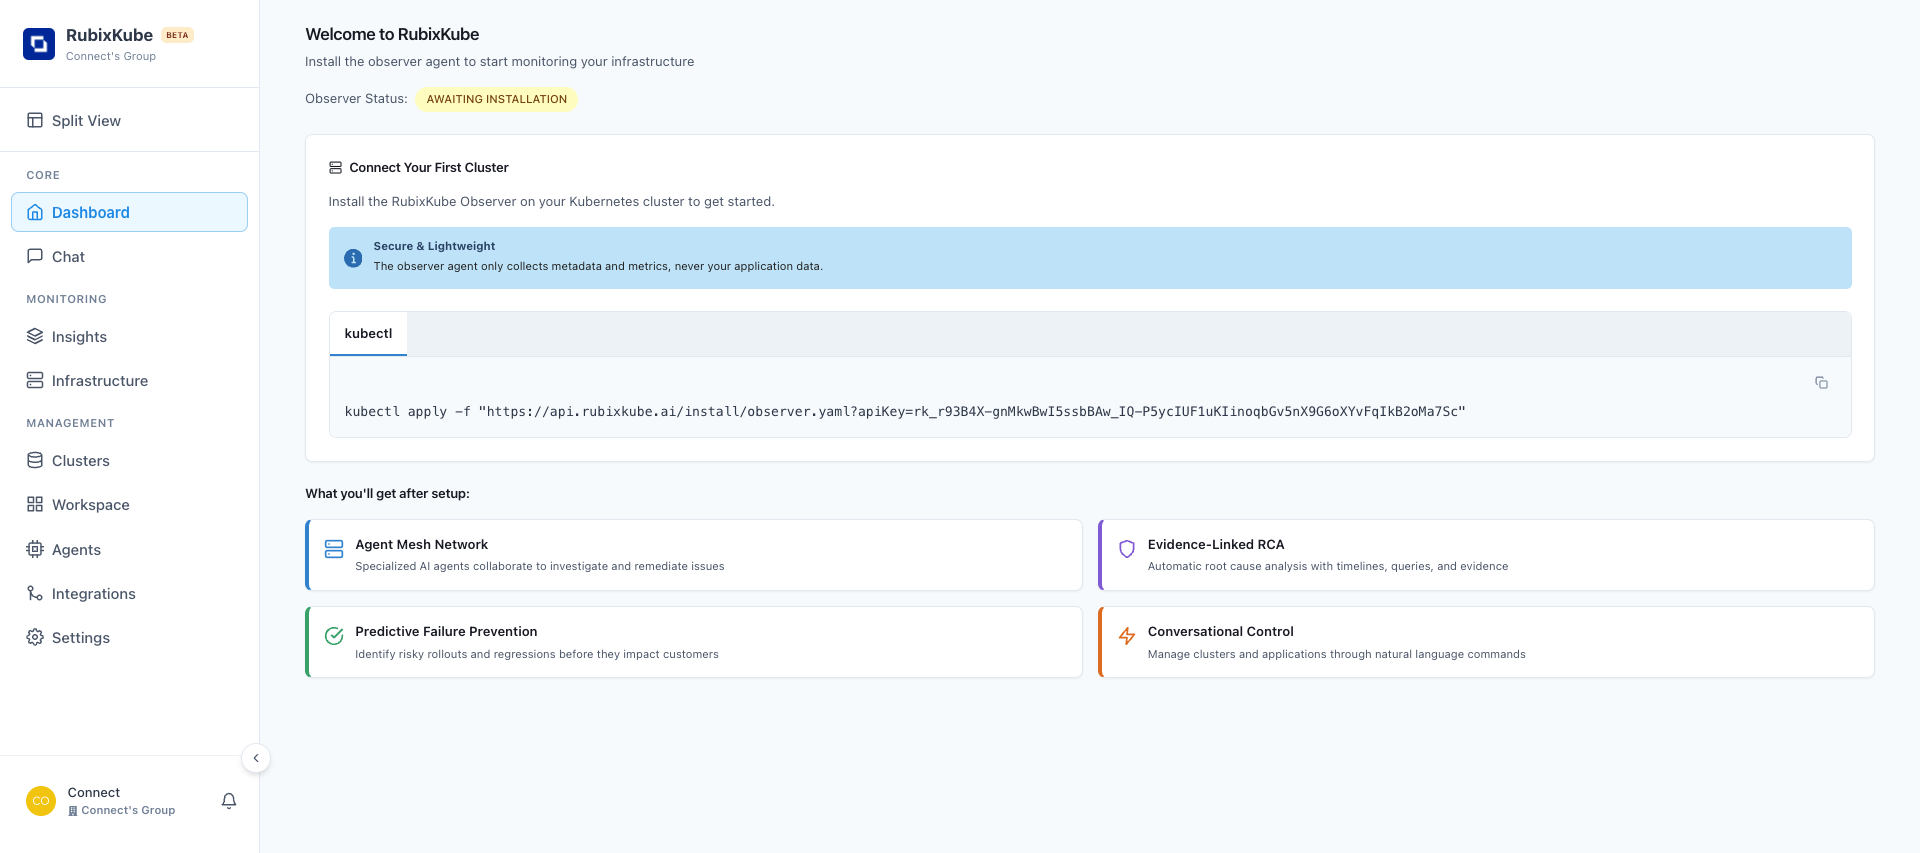
Now let’s install the RubixKube observer agent on your local cluster!Get Your Installation Command
- Log in to RubixKube Console at console.rubixkube.ai
- After login, you’ll see the “Connect Your First Cluster” onboarding screen
- Copy the kubectl command shown on the page
Run the Installation Command
Paste your command into the terminal and press Enter:Expected Output:
Step 6: Verify RubixKube Installation
Let’s make sure RubixKube is running correctly in your cluster!Check if Pods are Running
What does successful installation look like?
What does successful installation look like?
READY column shows:
STATUS column shows:
RESTARTS column shows:
1/1 (1 out of 1 containers ready)STATUS column shows:
RunningRESTARTS column shows:
0 (or low number)This means RubixKube observer is:- Successfully deployed
- Running and healthy
- Connected to RubixKube cloud
- Monitoring your cluster
What if STATUS shows 'ImagePullBackOff'?
What if STATUS shows 'ImagePullBackOff'?
This means Docker couldn’t download the RubixKube image.Common causes: - Internet connection issuesIf still failing after 5 minutes, delete and reinstall:
- Docker Hub rate limits
What if STATUS shows 'CrashLoopBackOff'?
What if STATUS shows 'CrashLoopBackOff'?
This means the pod started but crashed.Check logs to see why: ```bash kubectl logs -n rubixkube-system deployment/rubixkube-observer
How do I see detailed pod information?
How do I see detailed pod information?
Get detailed information about the pod:This shows:
- Events (what happened during startup)
- Container status
- Resource usage
- Error messages (if any)
Check Observer Logs
See what RubixKube observer is doing:Verify in RubixKube Dashboard
- Go back to console.rubixkube.ai
- You should see your cluster appear in the dashboard
- The Observer Status should change from “Awaiting installation” to “Connected”
Note:It may take 1-2 minutes for your cluster to appear in the dashboard after the pod starts running.
Step 7: Deploy a Test Application (Optional)
Want to see RubixKube in action? Let’s deploy a simple app to monitor!Deploy Nginx
View Your Workloads
Check RubixKube Dashboard
Go to console.rubixkube.ai and navigate to:- Dashboard - See cluster health
- Infrastructure - View your nginx deployment
- Chat - Ask “What pods are running?”
Managing Your KIND Cluster
Useful Commands
List all KIND clusters:Common Issues & Solutions
Docker daemon not running
Docker daemon not running
Error:
Cannot connect to the Docker daemonSolution: - macOS/Windows: Open Docker Desktop app and wait for it to start- Linux: Run
sudo systemctl start docker
KIND cluster creation fails
KIND cluster creation fails
Error:
failed to create clusterSolutions: 1. Ensure Docker has enough resources (4GB+ RAM recommended) 2. Check Docker is running: docker ps 3. Delete any existing cluster: kind delete cluster --name rubixkube-local 4. Try creating againkubectl: command not found
kubectl: command not found
Error:
kubectl: command not foundSolution: - Kubectl is not in your system PATH- Re-install kubectl and ensure it’s added to PATH
- Try full path:
/usr/local/bin/kubectl(macOS/Linux)
Port already in use
Port already in use
Error: Or specify custom ports when creating cluster.
address already in useSolution: Another process is using Kubernetes default ports.Delete existing KIND clusters:RubixKube observer not starting
RubixKube observer not starting
Next Steps
Explore the Dashboard
Take a tour of the RubixKube console and learn the basics
Try Breaking Things
See RubixKube detect and fix issues automatically
Deploy to Production
Ready for production? Install on a real cloud cluster
Chat with Your Infrastructure
Learn how to use natural language to query your cluster
System Requirements
Minimum Requirements
| Component | Requirement |
|---|---|
| OS | macOS 10.15+, Windows 10+, Linux (any modern distro) |
| RAM | 4GB minimum, 8GB recommended |
| Disk Space | 20GB free space |
| CPU | 2 cores minimum, 4 cores recommended |
| Docker | Version 20.10+ |
| Internet | Required for installation and RubixKube sync |
For Production-Like Testing
| Component | Recommendation |
|---|---|
| RAM | 16GB+ |
| CPU | 4+ cores |
| Disk | SSD with 50GB+ free |
Comparison: KIND vs Cloud
| Feature | KIND (Local) | Cloud Cluster |
|---|---|---|
| Cost | Free | Paid |
| Setup Time | 5-10 minutes | 10-30 minutes |
| Use Case | Testing, Learning | Production |
| Performance | Limited by your machine | Full cloud resources |
| Persistence | Data lost when cluster deleted | Persistent storage |
| Internet Access | Works offline (after setup) | Always requires internet |
| Load Balancers | Simulated only | Real cloud load balancers |
Need Help?
Support
Email us at connect@rubixkube.ai
Troubleshooting Guide
Visit our troubleshooting page
Community
Join our Slack community for help
Documentation
Browse our complete docs
Stuck?Don’t hesitate to reach out. We’re here to help you get started with RubixKube!